
While using Windows applications, some users report encountering an error indicating that the Mfc140.dll file is missing or cannot be found. This issue typically prevents the application from launching, negatively impacting users’ work and entertainment experiences.

Mfc140.dll is part of the Microsoft Foundation Classes (MFC) library, which is widely used in the development of many Windows applications. If this file is absent or corrupted, the associated applications may fail to function properly. Are there any methods to assist users in overcoming this issue? This article provides 8 methods to swiftly fix this issue.
What is Mfc140.dll?
The Mfc140.dll file is part of the Microsoft Foundation Classes (MFC) library, primarily used for developing Windows applications. MFC is an object-oriented C++ class library designed to simplify the development process of Windows applications, enabling developers to create applications with graphical user interfaces (GUIs) more efficiently.
Mfc140.dll is widely utilized in numerous commercial software applications and tools, including graphic design software, CAD applications, and database management tools. Developers typically rely on this file to ensure the proper functioning of applications when using versions of Visual Studio 2015 and later.
Overview of the “Mfc140.dll Not Found” Errors
Mfc140.dll errors occur when the mfc140.dll file within the Microsoft Foundation Classes (MFC) library is missing or corrupted. Such errors can prevent applications developed with MFC from functioning correctly. There are several potential causes for these errors, including:
- Missing File: The mfc140.dll file may not have been copied correctly during the application installation.
- Corrupted File: The file can become corrupted due to virus infections, improper shutdowns, or hard disk failures.
- Version Mismatch: The application may require a specific version of mfc140.dll, but a different version is installed on the system.
- Microsoft Visual C++ Issues: Problems can arise if the Microsoft Visual C++ Redistributable package is not installed correctly or if an outdated version is being used.
When an Mfc140.dll error occurs, users may encounter error messages such as:
- Mfc140.dll not found.
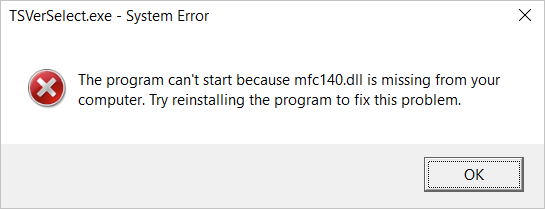
- The program can’t start because mfc140.dll is missing from your computer. Try reinstalling the program to fix this problem.
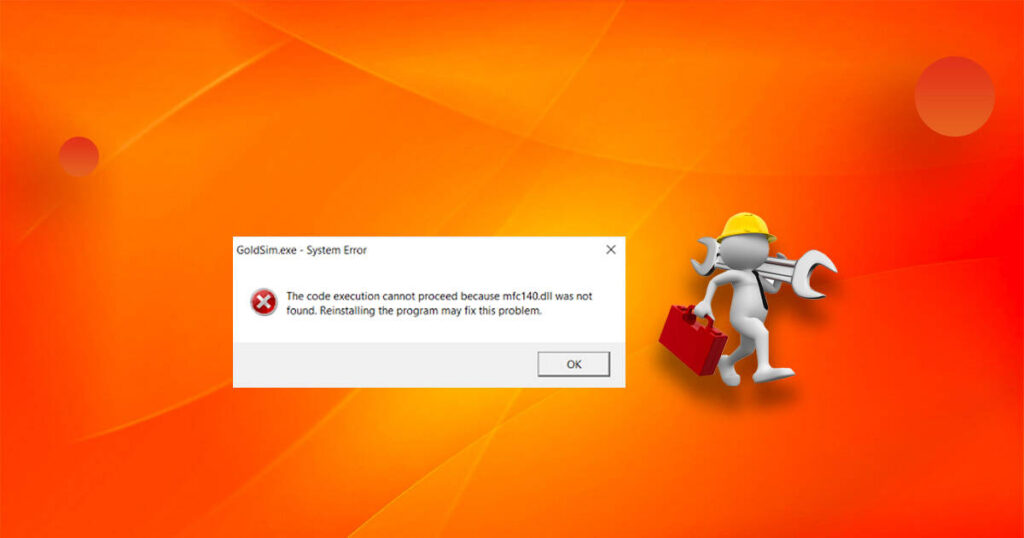
- The code execution cannot proceed because mfc140.dll was not found. Reinstalling the program may fix this problem.
These error messages indicate that the application requires the mfc140.dll file, which cannot be found or loaded correctly. When the missing or not found error occurs, users may be unable to use the application effectively, and in some cases, it can even lead to system crashes. To resolve this error, refer to the following troubleshooting methods.
How to Fix the Mfc140.dll Error
Method 1: Reinstall the Application
To resolve the error, you can uninstall the affected application and then reinstall it. This process helps restore any missing or corrupted DLL files. By doing so, you ensure that all necessary components required for the application to function correctly are freshly installed.
- Open Windows and navigate to “Control Panel.”
- Click on “Uninstall a program.”
- Find and select the relevant program, then click “Uninstall.”
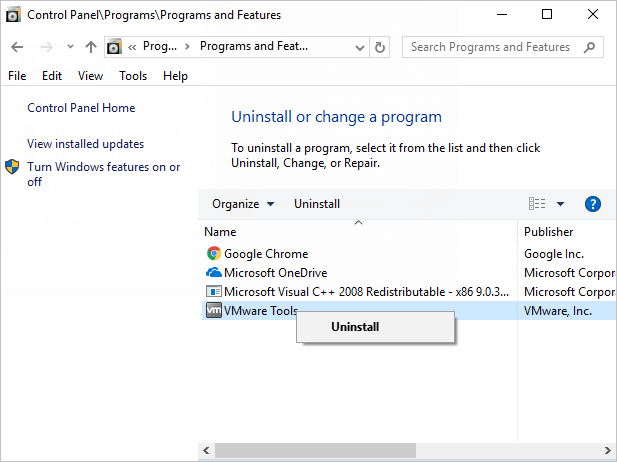
- To ensure the program is completely uninstalled, choose “Restart” before installing any compatible updates.
- Restart your computer and test to see if the program operates correctly.

Method 2: Use a DLL Fixer to Fix the Mfc140.dll Error
If you want to resolve the Mfc140.dll error quickly and efficiently, using a DLL Fixer is recommended. One excellent choice is Bitwar DLL Fixer. This tool features a comprehensive database of DLL files and automatically scans your system to identify any missing or corrupted DLL files. It can reinstall the required DLL files directly into the application’s directory, eliminating the need for manual file placement. This not only enhances the stability of the application but also improves overall system performance. Additionally, its intuitive interface makes it user-friendly, allowing even beginners to navigate it with ease.
Benefits of Bitwar DLL Fixer Software:
- Easily fix or replace corrupted, damaged, or missing DLL files with a single click.
- Recover lost DirectX files and runtime libraries efficiently.
- Enjoy a reliable solution with a strong success rate and free technical support.
- Use the tool without any special technical knowledge or manual adjustments.
- Quickly scan your computer to identify DLL errors causing program issues.
- Resolve launch problems for Windows programs and games promptly.
Follow the steps below to use Bitwar DLL Fixer to restore the Mfc140.dllfile.
Bitwar DLL Fixer Official: https://www.bitwarsoft.com/dll-fixer
Free Download Bitwar DLL Fixer:


Steps to Repair DLL Files Using Bitwar DLL Fixer
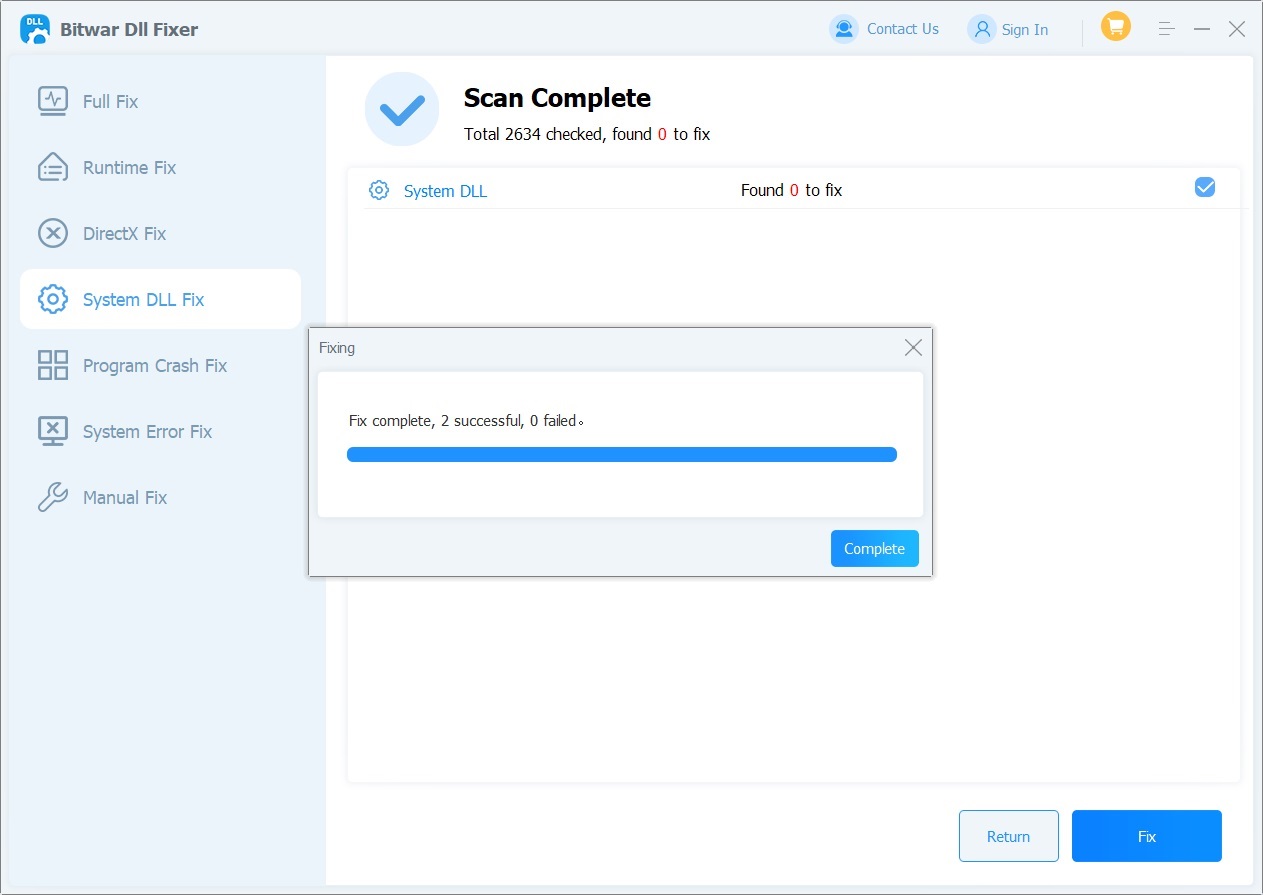
- Download and launch Bitwar DLL Fixer. Select “Full Fix” from the left panel.
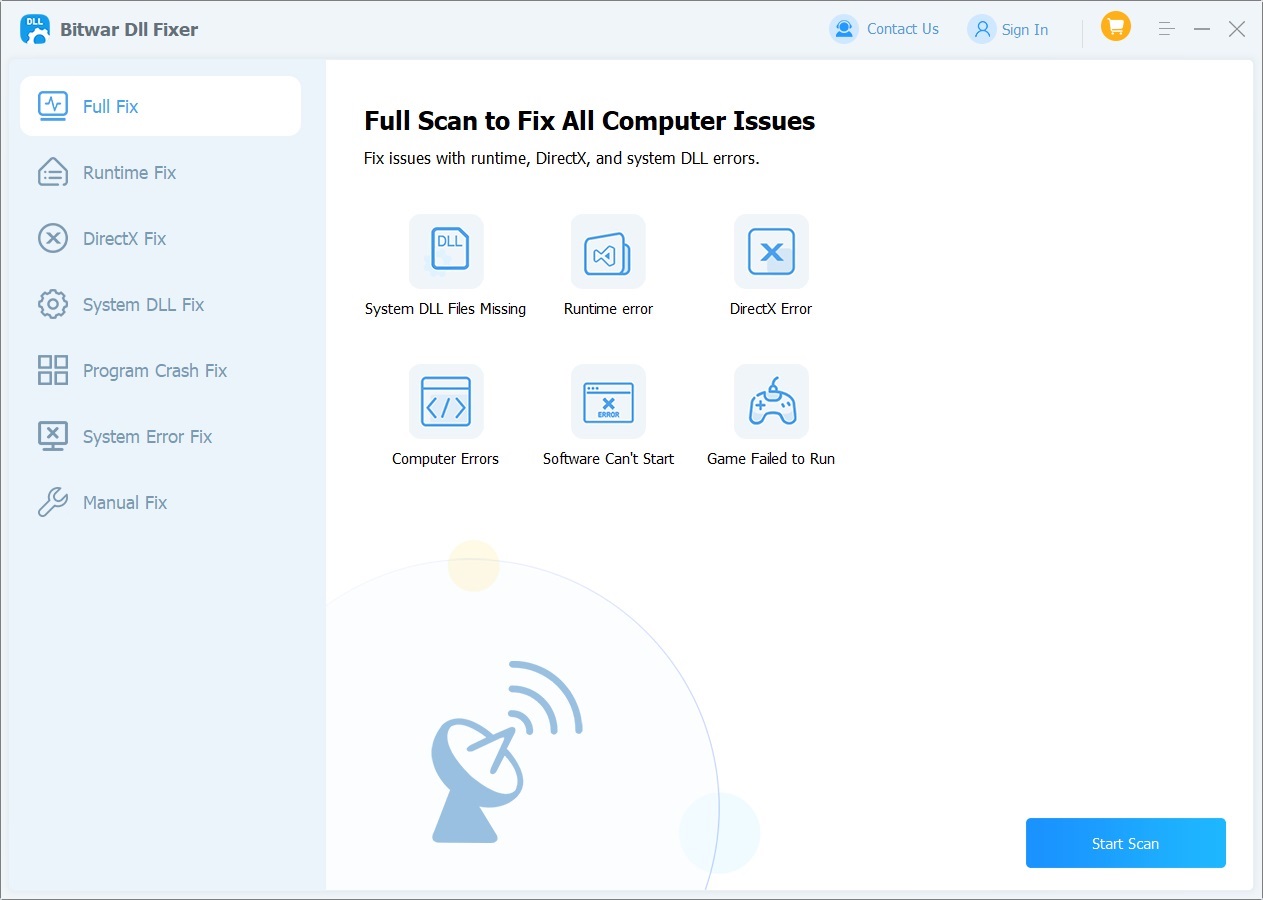
- Click “Start Scan” and wait for the scan to complete. Review the listed DLL files and click the “Fix” button to fix the identified DLL files.
- Once the fix is finished, a notification will appear. Check if the issue is resolved by launching the related program.


If the Mfc140.dll file you want to fix cannot be found using the “Full Fix” or “System DLL Fix” options, you can attempt a manual fix.
Manual Fix Steps:
- Click on Manual Fix and enter the DLL name along with the desired save path.
- Next, click on Start Scan. Select the appropriate version for your computer and click Fix.
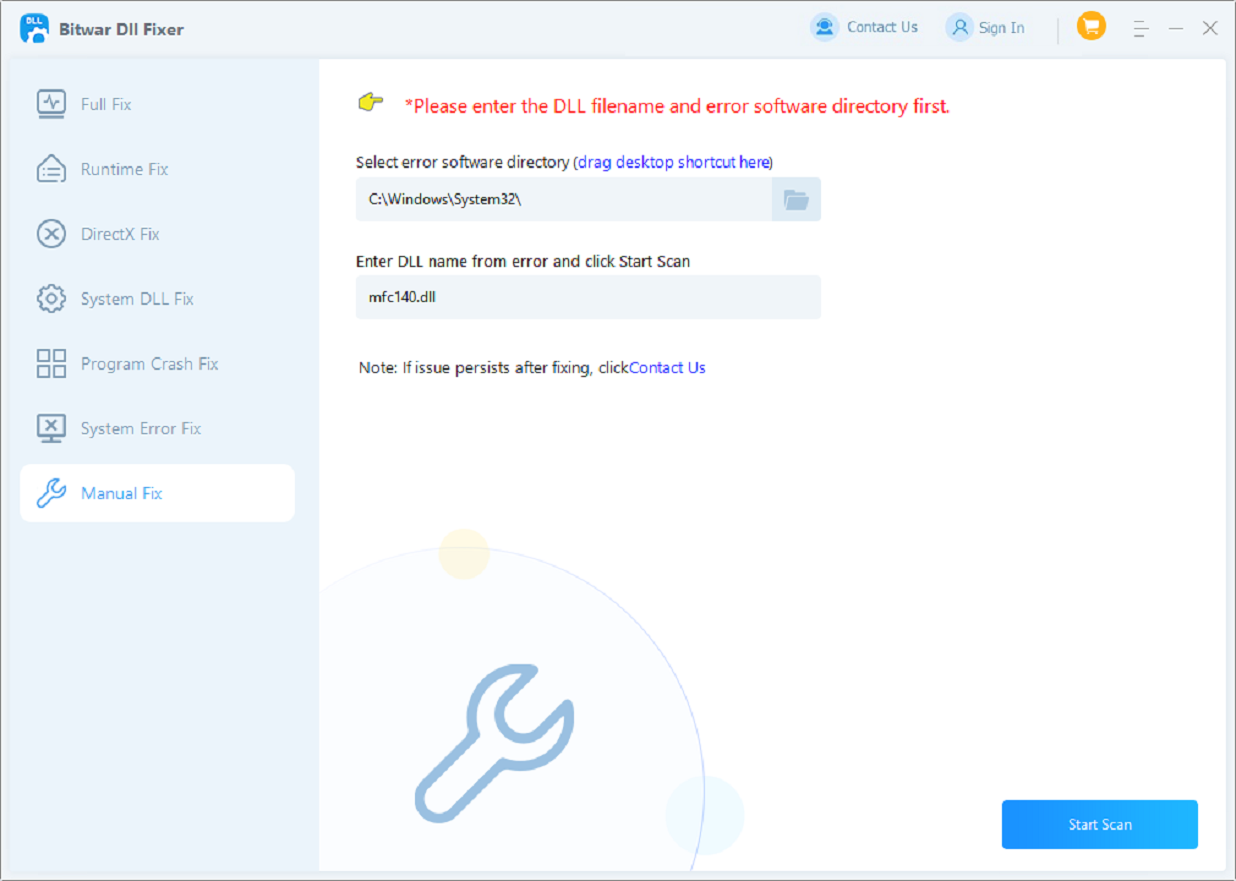
- Once the fix is complete, it is highly recommended to restart your computer. This will ensure that the repair is properly applied and stabilize system performance.

Method 3: Manual Download of the Mfc140.dll File
To download the Mfc140.dll file, start by obtaining it from a reliable website. obtain it from a reliable website and copy it to both the C:\Windows\System32 and C:\Windows\SysWOW64 folders for 64-bit systems. Ensure the file is correctly registered in the registry editor, then restart your computer to apply the changes.
Follow these steps to download the DLL for free:
- Download the latest version of the missing Mfc140.dll file.
- Navigate to C:\Windows. Locate the System32 and SysWOW64 folders. If you’re using a 32-bit Windows OS, only the System32 folder will be present. Copy the 32-bit Mfc140.dll file there. If you’re on a 64-bit Windows OS, copy the 32-bit Mfc140.dll file to System32 and the 64-bit version to SysWOW64.
- Press Windows + S to open the search bar, and type cmd. Then run Command Prompt as an administrator.
- Enter regsvr32 mfc140.dll and press Enter.
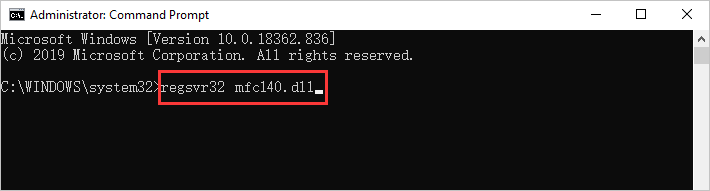
- Wait a moment, then restart your system.

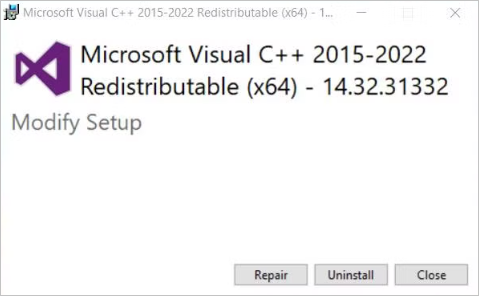
Method 4: Reinstalling the Microsoft Visual C++ Redistributable Package
The Microsoft Visual C++ Redistributable Package is a software package provided by Microsoft that includes the runtime libraries and components necessary for developing applications in C++. This package ensures that programs developed with Visual C++ can run in environments where Visual Studio is not installed.
The Mfc140.dll file is part of the Visual C++ Redistributable Package. When you install this package, mfc140.dll is automatically installed on your system. If you encounter an error indicating that mfc140.dll is missing, reinstalling the Visual C++ Redistributable Package usually resolves the issue. This process guarantees that all related DLL files are correctly installed.
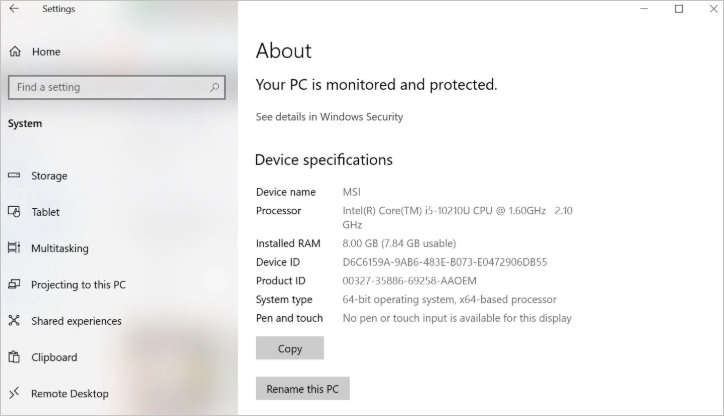
- Press “Ctrl+I” to open Windows Settings, then click “System” > “About”.
- Check your System type (32-bit or 64-bit).
- Visit the Microsoft Visual C++ download page and download the appropriate Redistributable Package.
- Open the downloaded file and install it on your computer. If it’s already installed, choose the Repair option to fix the existing installation. If repair fails, uninstall the old version first, then reinstall the latest version.
- Restart your computer and check if the error is resolved.


Method 5: Scanning and Repairing Files
Windows includes a valuable tool called the System File Checker (SFC), which can identify and repair missing or corrupted system files like mfc140.dll. Accessible through the Command Prompt, this feature helps maintain system integrity, preventing application errors and crashes while enhancing stability. Additionally, the Deployment Imaging Service and Management Tool (DISM) can detect file corruption and restore missing DLL files. DISM is also capable of working with offline Windows images, allowing for quick identification of mfc140.dll error root causes and improving overall system performance.
- Open the Command Prompt and run it as an administrator.
- Type sfc /scannow and press Enter.
- After the SFC command completes, enter the following DISM command in the CMD window and press Enter.
Dism /Online /Cleanup-Image /RestoreHealth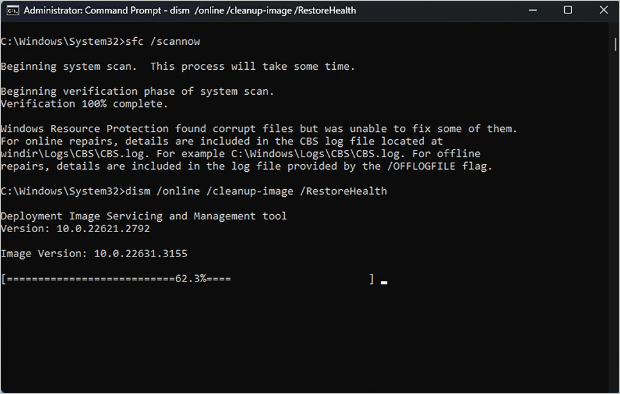
- Wait for the command to finish, and once completed, close the CMD window and restart your system.

Method 6: Scan for Malware
It’s advisable to use Windows Defender to check for viruses or malware that may be present on your computer. Security experts note that infected PCs can experience errors like mfc140.dll. Additionally, error messages may be caused by malicious software disguised as a DLL file. To proceed, access the Windows Defender settings and enable the scan mode to ensure a thorough examination of your system.
- Press Ctrl+I to open Windows Settings, then select Update & Security > Virus & threat protection.
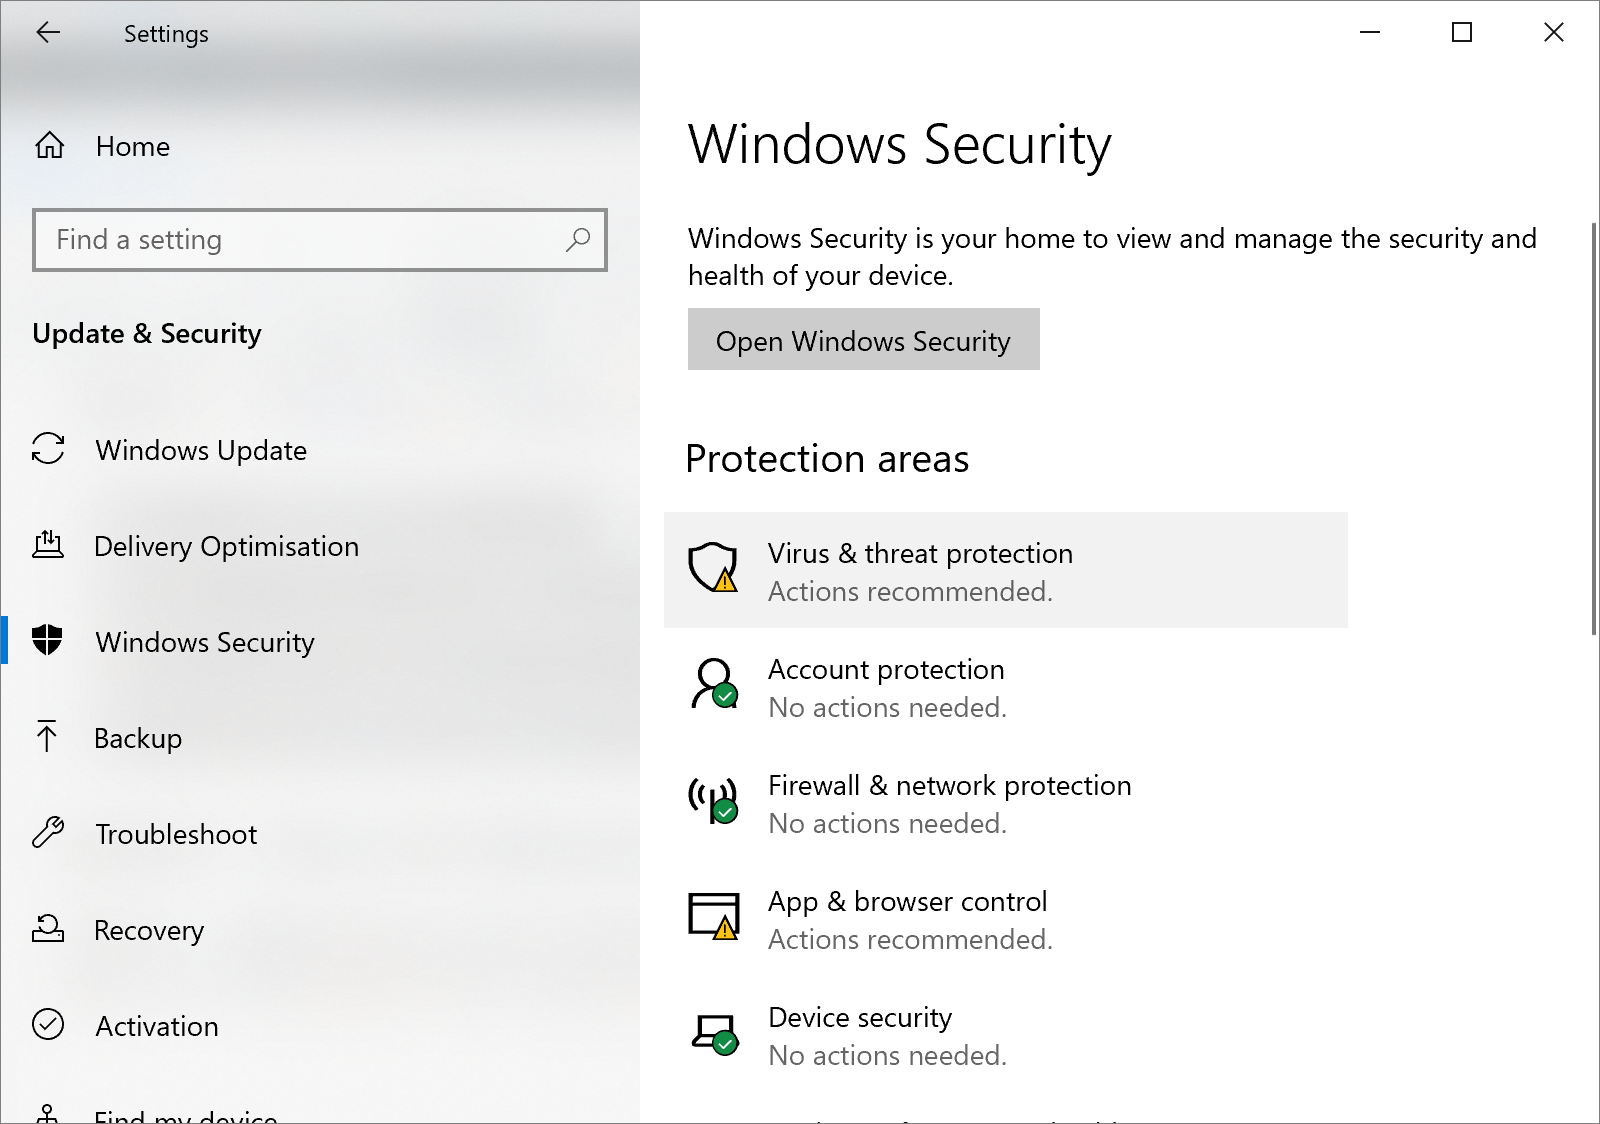
- Then click on Scan options.
- On the Scan Options window, choose Microsoft Defender Offline scan and click Scan now.
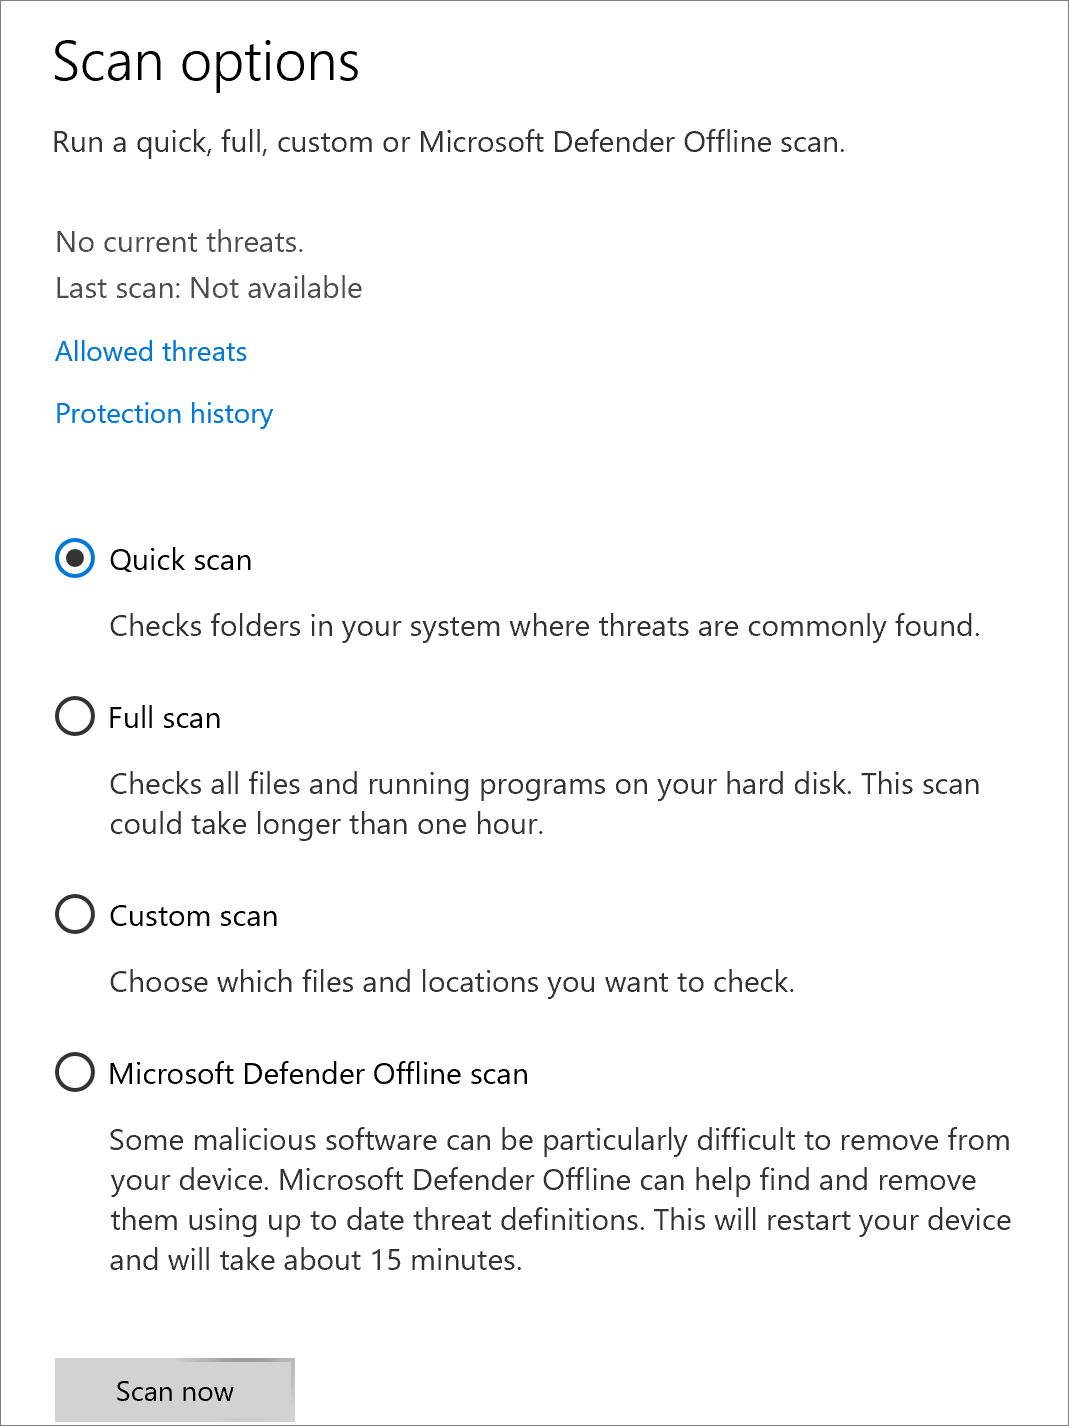
- This will cause your computer to restart immediately and initiate a deep scan.


Method 7: Update Windows System
Updating your Windows system can fix mfc140.dll errors. The latest updates address known bugs and security issues, improving how libraries work together. These updates can also boost overall system performance and application stability. Furthermore, better security helps protect against malware that could corrupt mfc140.dll.
- Press Ctrl+I to open Windows Settings, then select Update & Security.
- Navigate to Windows Update and click Check for updates.
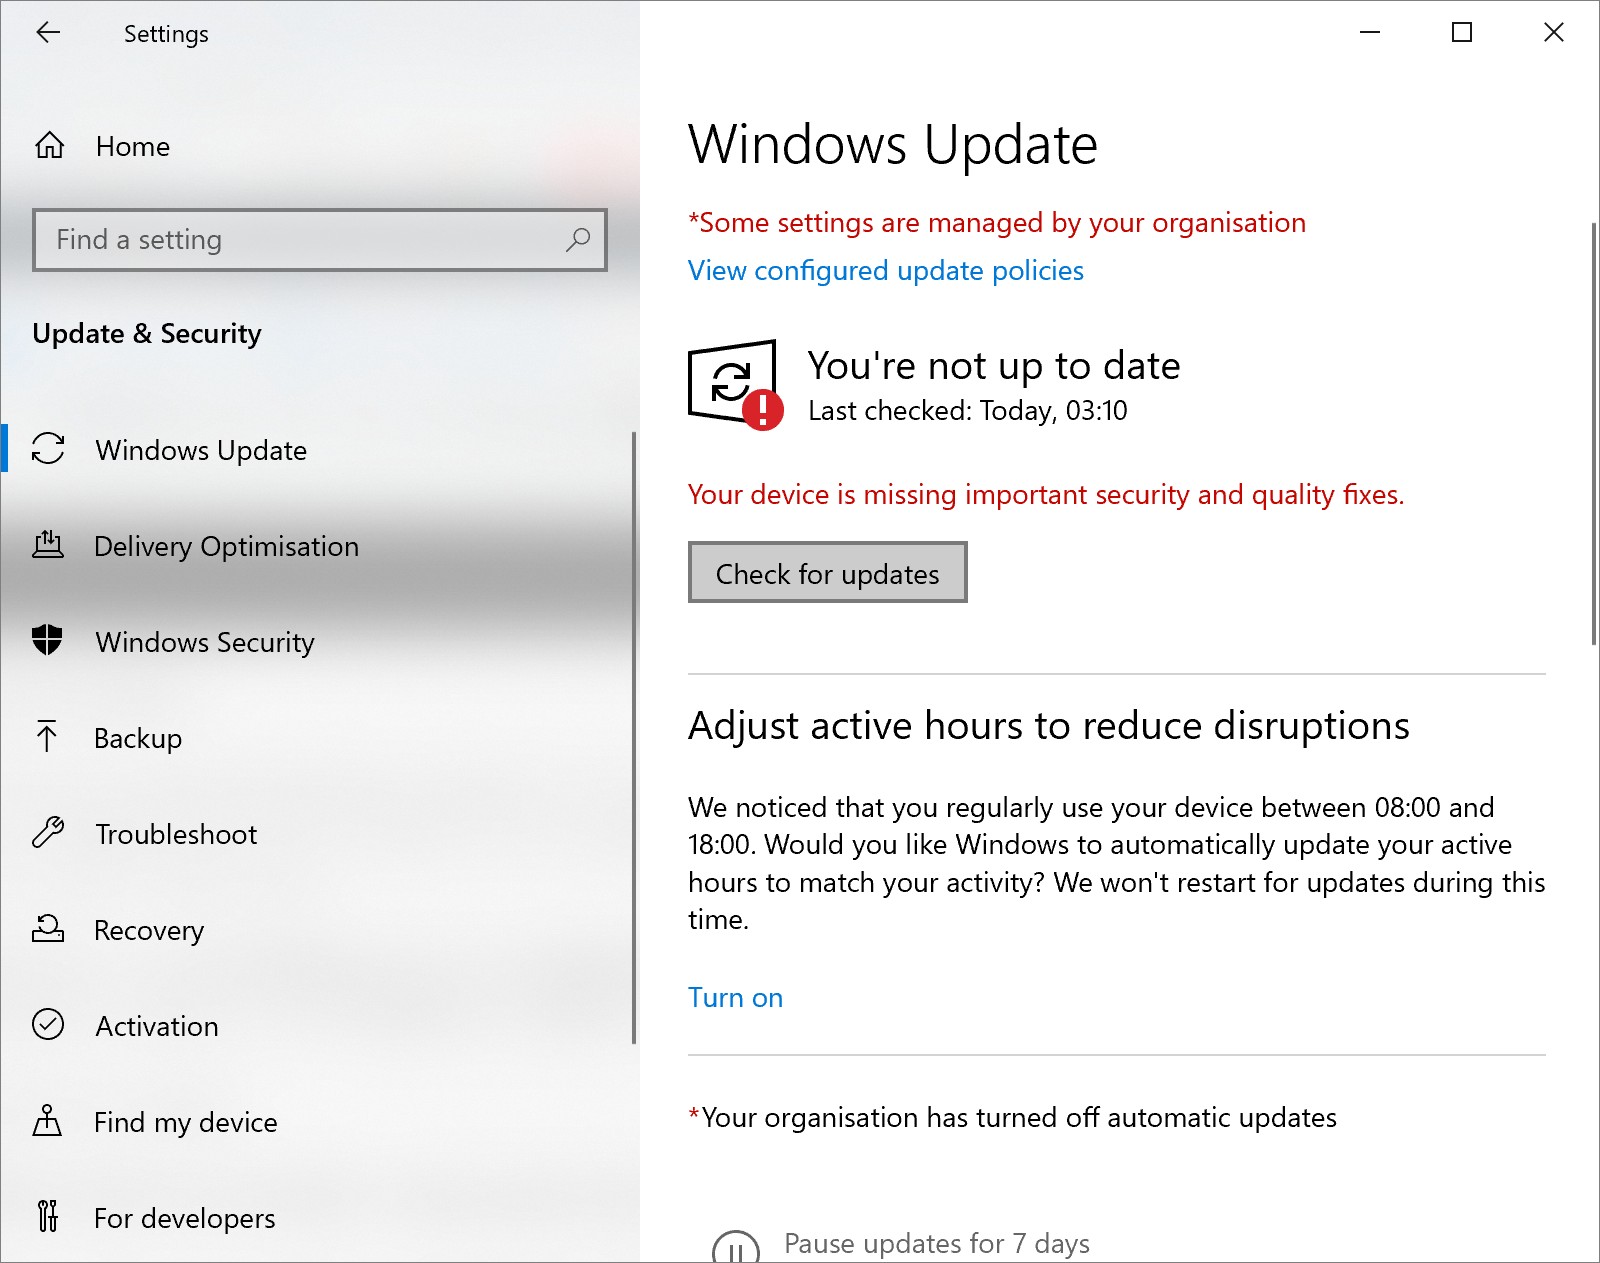
- If a new Windows update is available, a Download and install button will appear. Click Install now and follow the on-screen instructions to install the latest updates. Once this process is complete, your system will be up to date.

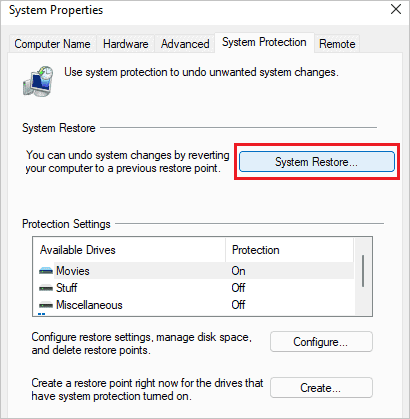
Method 8: System Restore
If errors have arisen due to recent changes, you can use the System Restore feature to revert your system to a previous stable state. This function allows you to restore your system to specific restore points from the past, returning it to a point before any changes. It effectively resolves issues caused by software installations or configuration adjustments. Additionally, System Restore is a highly effective method for recovering system stability without losing any data.
- Type Create a restore point in the search bar and select the top result to open the System Properties page.
- In the System Properties window, click the System Restore button.
- Click the Next button and select Restore Point you wish to use to undo changes. You can click the Scan for affected programs button to see which applications will be removed as a result of this restoration.
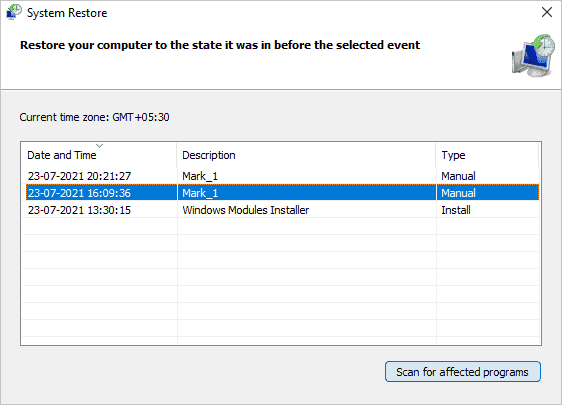
- Click Next and then Finish to complete the restoration process.
- After you finish these steps, your system will revert to the selected restore point, potentially resolving any issues caused by recent changes.


Conclusion
The “mfc140.dll not found” error is a frustrating issue for many Windows users, often caused by accidental deletion or incomplete installations. However, there are 8 methods available to address this problem. If you prefer not to fix it manually, you can use a powerful tool like Bitwar DLL Fixer. This tool comes with a comprehensive runtime library, allowing it to automatically replace or repair missing or corrupted DLL files, while also resolving related errors. Choose the repair method that best fits your specific error situation and personal needs. We hope this article has been helpful to you!